Creating Leads in ERPNext
Guide
In ERPNext, you can add potential customers or leads in the system prior to them committing for a sales purchase in your company. These leads can be sent with emails marketing materials as well as quotation if an opportunity arises. Furthermore, once this is converted, the record will be migrated from Lead to Customer in the system.
To create a lead:
Login to ERPNext
Go to CRM. Under Sales Pipeline, click on Lead.
Click New.
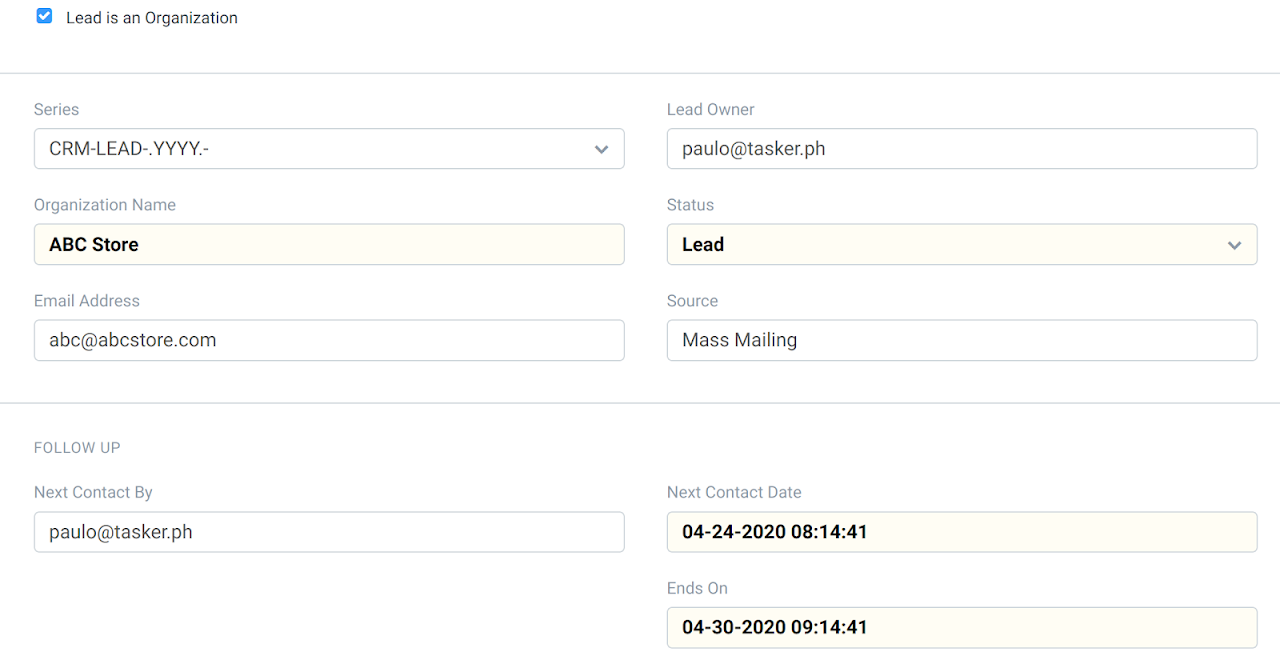
Enter the required information.
Lead is an organization - tick this box if the lead is an organization, not an individual
Organization / Person Name - name of the organization or the individual
Email Address - lead’s contact email
Source - indicate where the lead came from
Followup By - assign the person who will be responsible for the followup
Next Contact on - data of the next followup
End - date when marketing or follow up campaign will be ended
5. Select the Status of the lead.
Lead: This is the default status assigned when a Lead is created and it indicates an action is needed against this Lead.
Open: Sales executive needs to contact the Lead.
Replied: A sales executive has provided the information needed and response from Lead is awaited.
Opportunity: If an Opportunity is created against the Lead, the status is set to Opportunity. It indicates that the Lead is qualified and may lead to sales.
Quotation: If a quotation is created against a Lead, then the status is set to Quotation.
Lost Quotation: If the quotation given to the lead has been marked as lost, then the status is set to 'Lost Quotation'.
Interested: The lead is interested in the products or services.
Converted: If the quotation given to the Lead has resulted in confirmation of an order and if the Sales Order has been created against the quotation, then the status is set to Converted.
Do Not Contact: Lead is not interested and no further communication is needed.
6. Click Save to apply the changes.
7. If the Lead was successfully converted into sales, then you can create a Customer record. On the upper right part of the Lead’s header, click ‘Create’ and select Customer.
5. Click "Show Dashboard" on the upper right to preview.
6. Click Save to finalize.


